…And we’re back

That’s right, kids. We’re back. The howling winter winds are singing their swan song, and it can’t come too soon. For those of you that are keeping up, I posted the next recipe this very evening. I’m taking a step away from the vodka initiative to trying something new. I am very interested in the new bourbon recipe. I bet you’re all wondering why I’m excited. Well, it wouldn’t be a blog if I didn’t tell you. I’m interested for a variety of reasons:

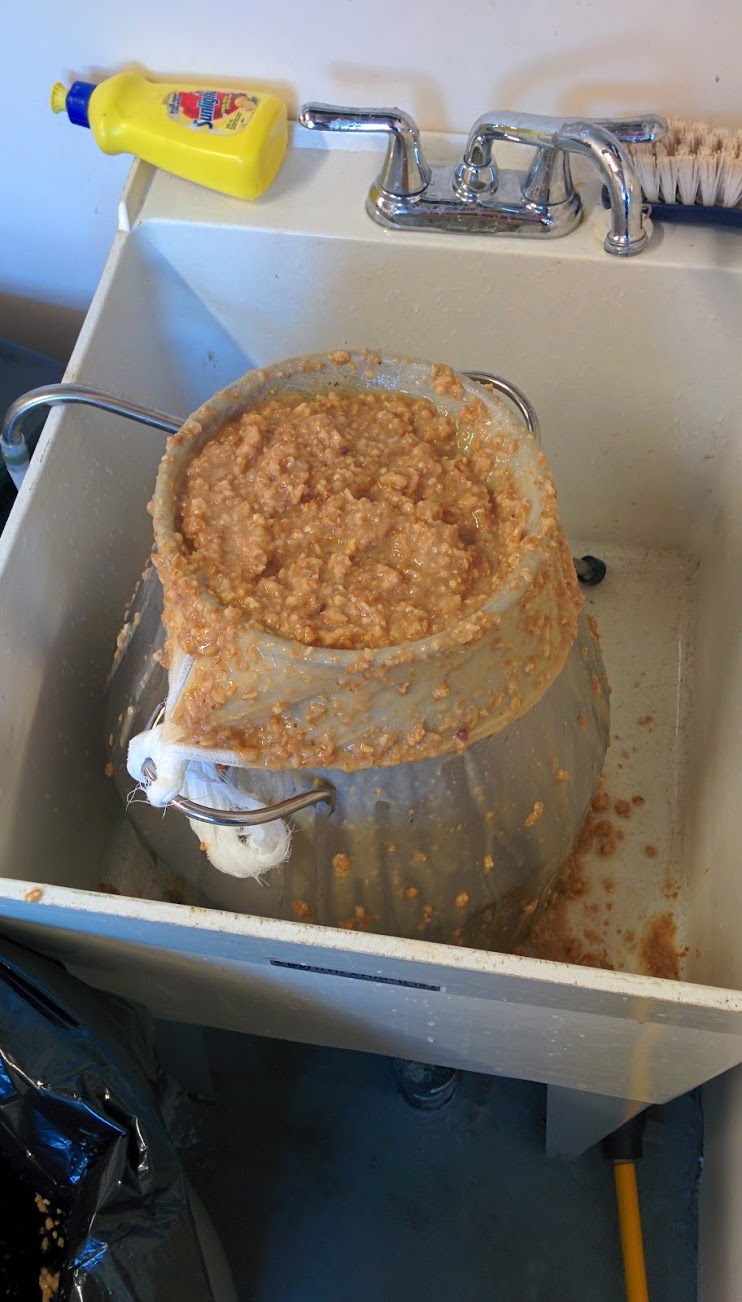
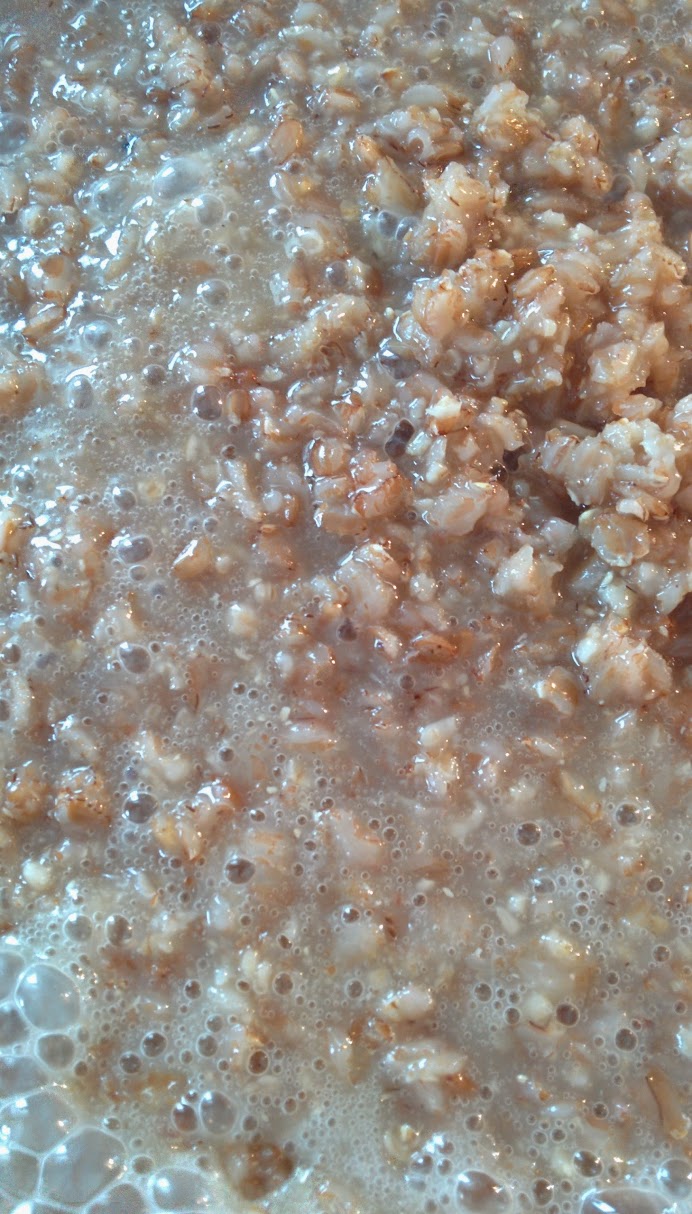
  1. Did you even look at the recipe? I dig it. If you’ve done your reading, you’ll know that bourbons are predominantly corn based. What I love about the recipe is that it’s simple. I like the fact that you start, for all intents and purposes, cooling the mash as soon as it starts to boil. You drop the cracked corn in, stir it about 5 times to get the starch nice and distributed through the water, and then…kapow. You drop the malt in to break the starch up into fermentable sugars. It’s simple. It’s elegant, and I really hope that it works as advertised.
  2. I’m using a new yeast. That’s right! I have been using Alotec 48 turbo, and it’s been swell. However, there’s something about a whiskey yeast that appeals to me. If I may toss a simile out there, turbo yeast is like an antipersonnel mine. Sure, it’s gets the job done, but it’s not really elegant. Turbo yeast does one thing, and one thing only. Turbo yeast takes sugar and makes booze. It’s a quantity, not a quality, game.
  3. I have aces in the hole. Again, I’m sure that you’re all avid readers. That means that you already know about my research into high adjunct mash fermentation and the enzyme amylase. You know that, come hell or high water, I will get yield from this run. That all being said I don’t think that I’ll need it.
  4. The more things change, the more they stay the same. I am tweaking things, but that doesn’t mean that i’m reinventing the wheel. All things aside, this is my third distillation. I’m better now than I was then. Perhaps that sounds peculiar, but we all know I’ve made mistakes. I’m not going to make the sames ones again. No, no. This isn’t hubris. This isn’t me thinking that nothing can go wrong. This is me believing that there must be a finite amount of mistakes that can be made, and I, like The Who, won’t be fooled again.

I don’t want to spoil the surprise, but there’s also a cutting experiment coming up. Well, I suppose my scientist friends wouldn’t consider it “An Experiment”. After all, I’m not testing a hypothesis. However, I am going to dissect this batch. I want to get to the core of batch cutting. I want to use the next batch as an exercise in understanding what can turn a whiskey into a good whiskey. That, my friends, is hubris. Humility be damned. I will make a good whiskey. Mark my words.

Regrouping

Like most of the men, women and children living in Canada, I begin watching the weather closely in March. March, after all, should bring the first stretch of days that are consistently above freezing in approximately one million days. That’s right. The 2014-2015 winter season was more of an ice age than a proper season. Those of you keeping up with my projects will no doubt recall that I was sent packing with my tail between my legs in January both because of the unforgiving cold that made the whole experience abysmal, and because the mash was more the consistency of a foul breakfast cereal than anything approaching a proper vodka mash. It seems that the cyclical nature of the seasons is looking to fix the first problem. If mother nature’s going to take care of one of the issues it behooves me to look at taking on the second one.

A careful review of the manifold problems of the Vodka 1 batch has left me with a list of valuable lessons:

1. Don’t operate a still in the cold. For the veterans out there, this is probably a no brainer. There’s nothing necessarily wrong with ‘stilling in the cold. The issue is my personal reaction to the cold. It makes me impatient. Impatience when operating a still isn’t a good thing. I was so agitated by the time my first run was over that I threw in the towel. I won’t tell you that this was all due to the cold…after all, the issues with the thickness of the mash had a lot to do with my malaise. That all being said, last time I ran the still I learned that I’m just wasting my time unless I’ve got my head on straight.

2. There’s no prize for filling your fermenter. That’s right, no prize. Do you know what you get for trying to squeeze a little extra something something into your fermenter? You get an explosion of foul smelling snot all over the place. Perhaps explosion is overly dramatic, but I can tell you that it ain’t pretty. The basin I kept the fermenter in looked rather like the on-set aftermath of a less reputable adult film. In my defense, I thought to myself, “self, this mash is thick. It’s not going to work well so you need to squeeze every drop…or, you know, gelatinous chunk that you can into that fermenter if you’re going to get anything out of it.” Well, self, fool me once, shame on me. Fool me twice, well, that’s even more shame. There’s a fill line and I intend to use it from now on.

3. WTF is an adjunct? Historically, I’ve thought of adjuncts only as the slave labor of the academic community. However, it turns out that adjunct is also the word for non-malted grains that don’t cleanly break down into fermentable sugars. Don’t get me wrong, I understood that rye and oats (you know…pretty much everything that went into the vodka mash) don’t easily break down the way a distiller wants, but I thought that the problem would be solved with the addition of the DME and the fact that I more or less boiled the grain to death. Ah, the naivete of youth. It turns out that DME is not a magical powder that will solve all of the problems with high adjunct mash.

So, what am I going to do differently? After all, March marks the beginning of the season. I will need to be an industrious ant during the warm months if I am to produce enough to party it up grasshopper style through the winter. I spent the last several weeks doing some casual research and for my next batch, there will be two main differences.

First, I will not be using turbo yeast. I’ve picked up some whiskey distiller’s yeast and my hope is that the different yeast will take away some of the after taste that I experienced with my first batch – the all sugar wash I’ve talked about in the past.

Second, I’ve learned a thing or two about schooling those contemptible adjuncts. How do I intend on doing this? Amylase. It appears that a single teaspoon of the enzyme amylase is enough to take on 5 gallons of thick mash. That doesn’t mean that I’m not going to heed the lessons of the past. I don’t think that the last batch could have been solved with amylase. It just means that I’ll have something on hand to increase the fermentable sugar content of the mash so that I can get more of the sweet, sweet ethanol at the end.

Lastly, I learned that I need to be careful when substituting ingredients (e.g. subbing flaked Rye for rye). I need to pay more attention to the consistency of the mash. I can’t simply follow a recipe blindly. I was so focused on doing it right that I ignored my instincts and kept on cooking and adding ingredients.

So, here we go again…onward and upward. I’m looking at bourbon recipes and am going to take that shot (pun intended) in the next few weeks.

The Brewhaus Essential Extractor.

Well, it’s been a while since I’ve posted, and, to be honest with you, I don’t plan on distilling again for at least a month. It’s too damn cold this time of year to wait around in the cold for hours and hours watching fluid trickle out of a chemically resistant hose. I’ve been meaning to write a little bit about the equipment used. There’s no time like the present.

I mentioned in the links page that I use the Brewhaus essential extractor. I won’t say that it’s a traditional pot still. It’s not the polished copper that pulls the heart strings of nostalgia, but it, in my admittedly limited experience, is a wonderful still. The reasons I like it, in a nutshell are:

  • Pricepoint – If you can find a better still at a lower price, make a comment.
  • Craftsmanship – The welds on this thing are great. The steel is good and thick, and I have every faith that this thing’s going to be with me for the long haul.
  • Reflux flexibility – Pack the column with whatever you like. I use copper mesh to help ferret out impurities, but you can drop in anything from steel wool to ceramic and it’s gonna be great.
  • Simple, straight forward temperature control – The Essential Extractor is everything you’ll need in one kit. This includes a submersible water pump, and enough hose to run not only through the condenser, but through the column itself has pipes welded in that you can, as I say, flood. Flooding the column sends cold water through the pipes and drops the column temperature in a hurry when you need it.

Here’s a picture of my brewhaus extractor fully assembled:

IMG_20150131_132950

It’s an 8 gallon pot (note the wide base to help keep the center of gravity low). Fully assembled (and on the burner) it stands a proud nearly seven feet tall. the wide base also keeps the heat diffusing nicely across the base of the pot, and, in case you have a small burner or hotplate, it even came with a diffuser plate. The other thing you guys should check out is the closeup shot of the column cooling system:

still cooling detail

You can hopefully make out a couple of things here. First, you can see the hoses where the cold water enters the bottom of the condenser and exits the top. You should also note the red valve. The red valve controls the flow of water through the hoses and pipes that cross the top of the column three times. When everything’s going easy you can keep the valve shut so that the water moves back from the condenser directly into the water bucket where it gets recycled. However, when things are perhaps a little bit more intense, you open the valve and the water moves through the column cooling everything down in a hurry.

One last comment regarding Brewhaus (and I swear that I’m not on their payroll) – I really like the fact that they provide everything a novice needs. This includes stills, fermenters, yeast, reading material and all the batch monitoring tools you need. A few folks have asked me where to go to get started. I’m certainly happy that I chose Brewhaus.

Batch Production – Recipe 1

For those of you that have reviewed my reviewed the mash cooking section of the blog, it won’t come as a surprise that the distillation was not as simple or straight forward (read: successful) as I had originally hoped. I guess what I’m trying to say is that while yesterday wasn’t a particularly good distilling day, I learned a whole lot.

Mash Straining

The problems yesterday were first identified when I opened the strainer. The mash, while it did have the trademark fermentation smell, smelled too sweet. It’s safe to say that I knew I was in trouble when I popped the lid on the fermenter and the sweet smell of unfermented sugar hit my nostrils. Needless to say, the mash didn’t thin out much. As I may have mentioned, my inexperience had led me to think that perhaps the DME would work to help break things (starches) down. While I believe that it did help, it’s certain that the breakdown did occur, it certainly didn’t occur to the extent that I had hoped. Take a look at this picture. You will see gigantic globs of rye sitting on top of the cheese cloth. Trying to get it strained was every bit as fun as you might imagine.

too mashy

So, fast forward about 70 minutes and I managed to get about 3 gallons of liquid out of the mash. I was concerned that it was too thick and would burn, so I added about 1.5 gallons of water. I thought, hey…I’m distilling the water out anyway.

Distillation

I’ll be honest and say that I was not in the best of moods by the time the mash was strained and ready to go. However, I was determined to make a go of it despite the projected low production of the mash. I got the still setup and put the heat to it. Here’s where I made a pretty interesting mistake. I’ll be honest, I’m not a student of physics. I’m not sure how it happened, but here it goes anyway. I decided that I didn’t need to start pumping cold water to the jacket that surrounds the condenser until we hit about 140 degrees (F) at the top of the still. The plan was to turn it on when it was at about 140 so that when the methanol started coming out at 150ish that I’d be ready to catch it. The interesting thing is that the temperature at the top of the column spiked like crazy. I’m not exaggerating when I say that we went from 140 to about 205 in the span of 10 seconds. I flooded the column (a neat little brewhaus thing that I’ll explain more in a future post), and took it back down to about 140, but I was less than impressed. The moral of the story here is that moving forward I will keep the condenser cool to prevent any unnecessary temperature fluctuations.

The rest of the distillation went about as expected. From my (approximate) 3 gallons, I got about 500 mL of product. Given the temperature issues that I experienced I will be doing a second distillation to make sure that I get the nasty bits out. I will probably just toss it in with my next attempt at a vodka and distill it with the new mash.

Final Thoughts

All in all, I’m interested in a second attempt at a rye vodka. Hey, it’s tradition. I will do some more checking around for a recipe and compare that with the first attempt (posted on the recipes page.

Recipe 1 Batch Production

To summarize my experience yesterday…nothing’s ever easy. For those of you that are keeping up, the Vodka Recipe (Recipe 1) was my first attempt at a batch using grain rather than a simple sugar wash. I can’t say that it went as I had hoped and dreamed. I’m not sure if the proportions of the recipe were off, or if my ingredients were off, or if I can’t follow simple instructions. I’m going to go with options 1 or 2. I have a high degree of confidence that my wife votes for option 3.

Anyhow, before we get going I should let you know what I used. I used Briess Flaked Rye, Flaked Oats (OIO), Briess Traditional Dark DME, about 4 pounds of generic amber honey, and the usual Alotec 48 turbo yeast.

It looked a lot like this:

Vodka 1 ingredients

There were several “command decisions” that had to be made throughout production. First, I overestimated the size of my pot. Historically, I’ve used a turkey frier pot, and that worked pretty well. However, when I thought about the ingredients I realized that the grains were going to expand and I had to cut the recipe back. So I settled on 6 gallons of water and modded the batch accordingly. However, that was not enough. I should have, in retrospect, gone with about 4.5-5 gallons. That was my mistake.

What I ended up doing was removing about a gallon of mash that was really, really thick (oatmeal thick) and adding some more water so that I could successfully stir the pot and not burn things to the inside of the (or make a mess on the stove). Because I took the grain out, I replaced it with simple syrup to keep the sugar content up. I decided to toss in a few frozen blueberries as well. The final distiller’s sin of the day was neglecting to take original gravity at the end of the process. With all of the other  issues, I was way past late by the time I got it into the fermenter and didn’t have the opportunity to let it cool and take the measurement.

This is what it looks like while it’s cooking away:

delish vodka mash

So the moral of this cautionary tale is that I need to be more aware of the volume increase the grain goes through. I need to be careful to leave more room. Additionally, I’m curious if the fact that I used flaked grains rather than regular grains. I went flaked because I thought it would breakdown into starches easier. I think it worked…but the expansion was remarkable.

I checked on it today, and it’s fermenting away. Hopefully in a week’s time I’ll have something usable. Filtering the mash is going to be quite the experience this time.

All frustration aside, I’m pleased that I took a shot at working directly with the grain. I’ve used the Mr. Beer beer kit before, and I’ve used a sugar wash. Regardless of the outcome, I think that making a move towards the grain was a good step. I think the yield will be odd. I’m sure that we’ll get something to distill (it is fermenting after all), but I’m just not sure what the yield will be. More to come on this, I’m sure.

Batch Thoughts – Vodka Preparation – Recipe 1

Next weekend I’ll be embarking on my first attempt at creating a grain based vodka. I figure that we could spend a few minutes discussing the process leading up to cooking the mash.

First things first
I decided to go with vodka for a couple of reasons. Vodka is a prolific liquor that’s used in a variety of cocktails. The quality of the vodka tends to be judged more on it’s tastelessness than any actual flavor profile. That means that I can worry less about my cuts and focus more on the process of distillation. It will also give me an excuse to get my activated carbon filter up and running. As I mention in the batch recipe, my intention is to triple distill the liquor and then run it through the filter. I’m sure that I’ll cover the filtration and distillation in upcoming posts.
I also went with vodka because it doesn’t require any aging. That’s right…for my second batch I want something that will provide some instant gratification.

The recipe and sourcing the ingredients
The recipe is based on a recipe I found online. I can’t honestly say which site I used. I’m sure if you cruise around the web looking for rye vodka recipes, you’ll find something very similar. I look forward to being at a place where I can write my own recipes, but I’m not there just yet.
I got my ingredients (all of them except for the honey) from beergrains.com. I linked them on the Links page. I lucked out and they have a pickup place just down the street from me at a brew pub. They have a good selection and the prices are reasonable. Not paying for shipping is another bonus.

What I’ll be watching…
I’ll be paying special attention to the grain and the texture of the mash. I’m specifically interested in the role the DME plays in the consistency of the batch. I’ll also be paying attention the the gravity. I’m going to attempt to start drawing a correlation between the amount of grain, type of grain and the sugar content of the mash. Ideally, I’ll be able to get a good reading on it and then heat it back up if necessary (it will be necessary for the yeast). Lastly, I am interested in any “non-vodka” tastes in the batch. I’m using Alotec 48 turbo yeast this round. I’m not sure what (if any) taste that will leave. The rum from the first batch wasn’t very…well…rummy. I want to see if there’s a similar taste with the vodka (before and after filtration).

Welcome to the Journal – Fair Warnings

So here it goes. First, I want to welcome you to The Distiller’s Journal. I’ll be honest and say that this post isn’t much fun. It contains all of the warnings that would be distillers should hear at least once. It also contains some information on getting started. If you’re reading the first post, it also likely means that the website doesn’t have a whole lot of meat on its bones just yet. Please bear with me as I continue to post information in order to turn this site into a workable knowledgebase for amateur distillers.

First Things First

I’m going to assume, since you’re hear that you’re interested in home distillation. I am also going to assume that if you’re interested in distilling your own liquor… there’s very little I’m going to do to talk you out of it. That being said, like an overly cautious parent, I’m going to tell you again.

1. You can kill yourself, your friends and everyone you ever met

Nothing quite like hyperbole. In all seriousness, distillation is something that should be done with care. There are a few risks that you should know about. First, while your still pot contains delicious, delicious alcohol, it also contains a variety of poisons that you want nothing to do with. These poisons include methanol and propanol which will do some damage over the long haul. When you’re making your cuts, and we’ll discuss your cuts later, it’s important to be careful and, when in doubt, err on the side of caution. A little part of you might die if you think you’re tossing away delicious ethanol. Just remember that it’s better a part of you die than the whole thing.

2. It’s probably illegal

Know the law in your country/province/state/county. Most countries have outlawed the unlicensed distillation of alcohol. Some countries tend to turn a blind eye if the quantity is sufficiently small, and you’re not selling it, but the moral of the story here is that you need to do some research to figure out what the risks are. No one can tell you how much risk is acceptable…it’s a decision that you’ll have to make for yourself.

3. You can blow yourself up

You remember all that good stuff coming out of your condenser? Well, its flammable and it’s pretty close to a heat source that may or may not be an open flame. Test your equipment before you use it, and keep a close eye on your equipment. Monitor the temperature of your column, monitor the temperature of the pot, monitor the flow from the condenser. Distillation should be fun, but care must be taken. Keep your wits about you, and you’ll be sippin’ on something delicious in no time.

There you go, I’ve said it and I feel better. If you are still interested in moving forward that’s on you. It’s a decision that every home distiller has to make for him or herself. If you’re still up for it, then read on.