A tale of woe.

So, how’s my week been? I know what you’re thinking, “any week ‘shinin’ is a good week,”. Ordinarily, I’d agree. However, remember that time I said something like, “I have a bunch of new equipment to try out. I don’t trust it, but I have high hopes,”? Well, the Chapman steel fermenter has left much to be desired…at least in my mind.

First, if you’re a home brewer or distiller, you’re probably aware that ants, to put it bluntly, fucking love the fermentation process. Why? Well, because where there’s fermentation there’s sugar. As Forrest Gump and/or Confucious said, “Fermentation and sugar go together like peas and carrots,”.  You simply can’t have one without the other. Mashes, washes and worts all have a high sugar content in the early stages.

But we know this, why is it relevant?

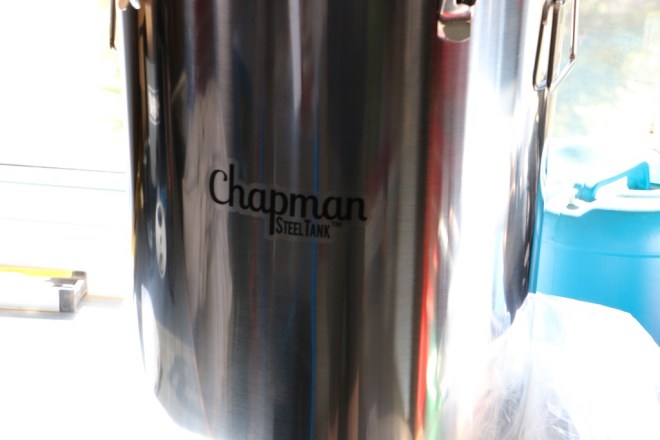
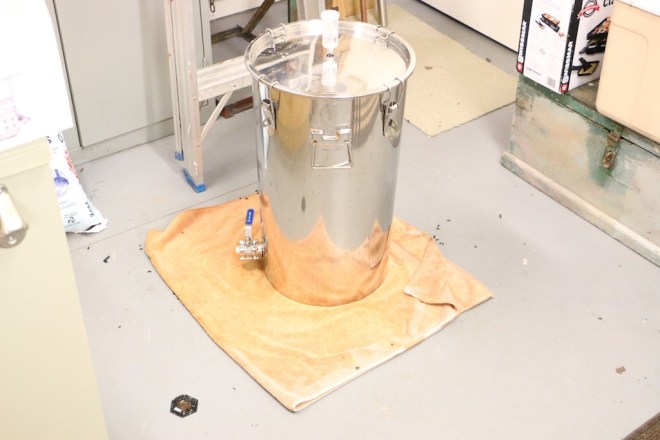
Because my superfly, deluxe Chapman 14 gallon stainless steel fermenter leaks. Yep. It leaks. Don’t get me wrong, the welding is all great. The problem is around the valve. Before you ask, yes, I did tighten it. I made sure it was closed. I placed the rubber washers appropriately, and I was judicious in the application of teflon tape. I have (what I hope) is a  $2.00 long term solution. I will let you know. Tonight is all about me ranting, so let’s get it on.

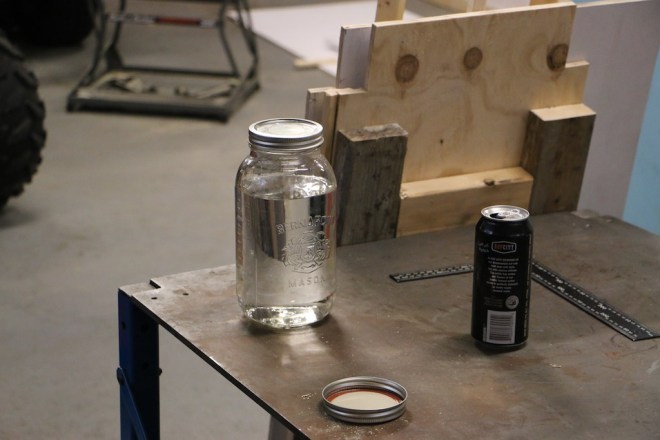
Here it is, the scene of the crime. You can see the soaking wet towel in the center of a scene of insectile slaughter. Truly, the 17th of May is a day that will live in ant infamy for generations to come.

IMG_1748

By the way, rum is both sticky and rank when it ferments.

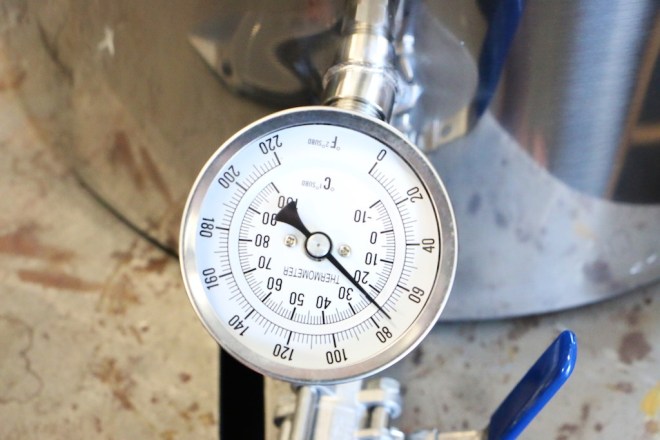
Lest you be concerned, I assure you that the booze is currently safe. I’ll publish some stats on it in a later post, but the rum that survived the leak fermented rather delightfully. The ABV in the wash continues to climb though I expect it to plateau and cease in the next few hours.

So, what did I do? Simple. I moved it.

IMG_1753

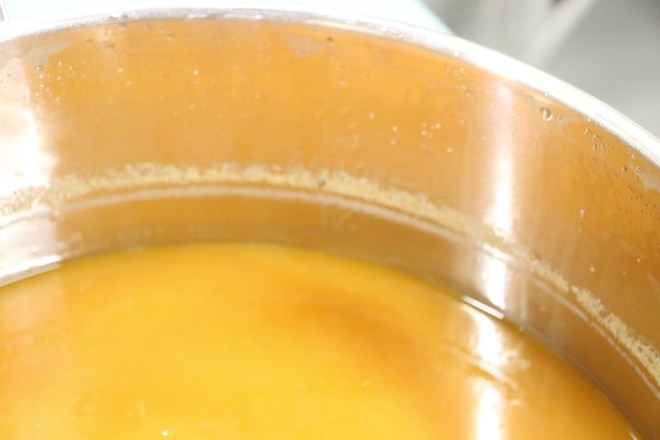
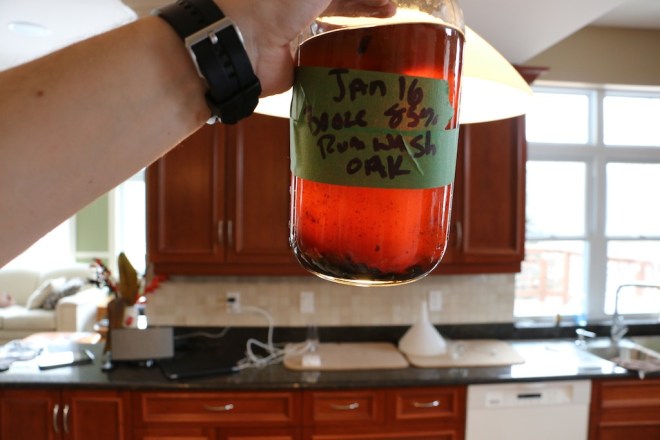
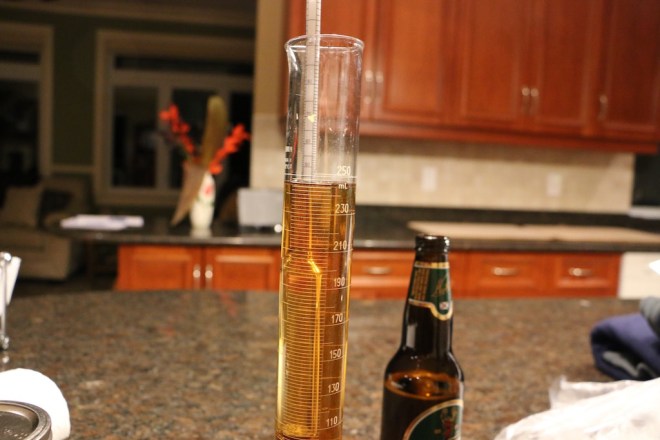
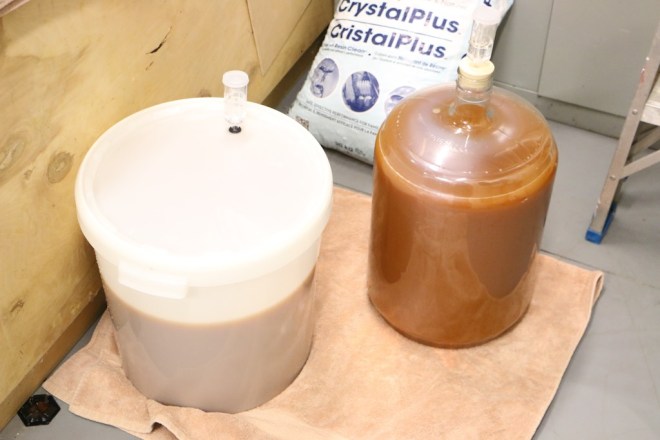
You should note a few things in this picture. First, and foremost, the fermentation has bleached the color from the rich brown to the tan that most distillers know and love. Second, you should be able to see the line where the wash was when the yeast was added, and it’s current level. At the time of this photo, I had lost around a gallon.

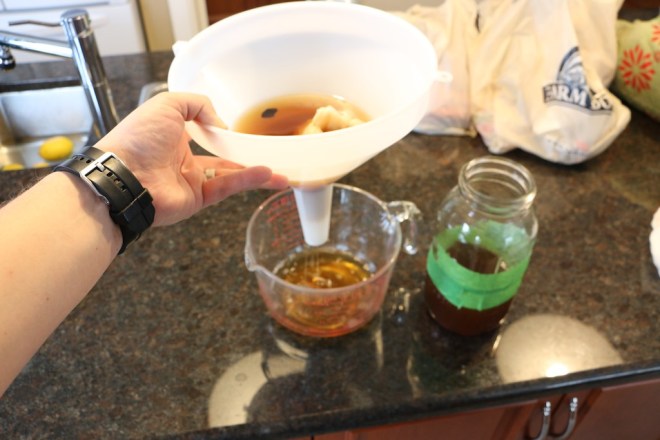
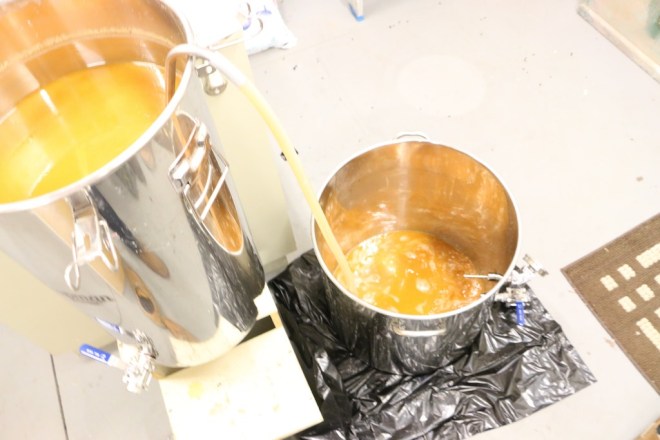
Here’s the wash in transit. Should any of you ever have to move fermenting liquid always remember:

  1. Keep it sanitary. The last thing you want is to lose a batch because of haste or general carelessness. This means sanitizing hoses, pumps, kettles, whatever it takes. I used my sweet new brew kettle.
  2. Limit exposure to air. Do you know what the anaerobic respiration of yeast doesn’t need? More Oxygen.
  3. Try to get as much of the sludge on the bottom as you can. Dormant yeast sinks. You don’t really need dormant yeast. Unfortunately, many of the yeast nutrients also sink. Scrape as much of the sludge as you can (in a sterile way)

IMG_1754

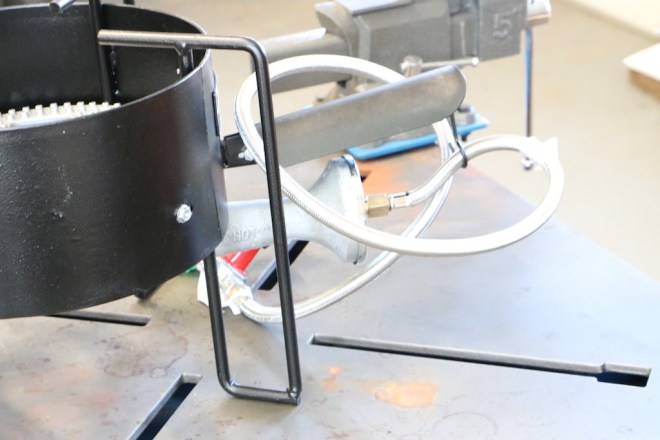
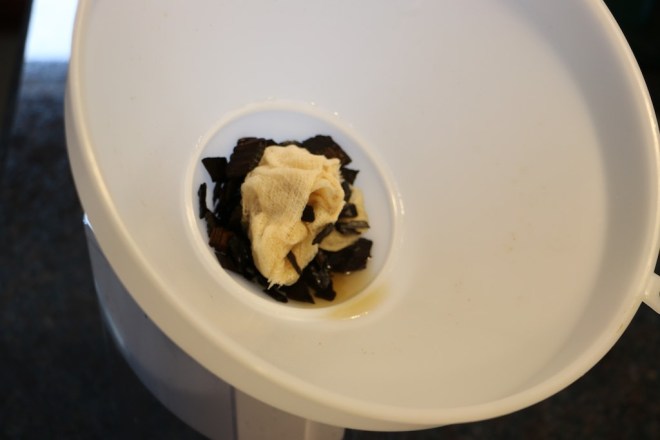
Once the booze was safely and sterile-ly in the kettle, I took a look at the fermenter:

IMG_1755

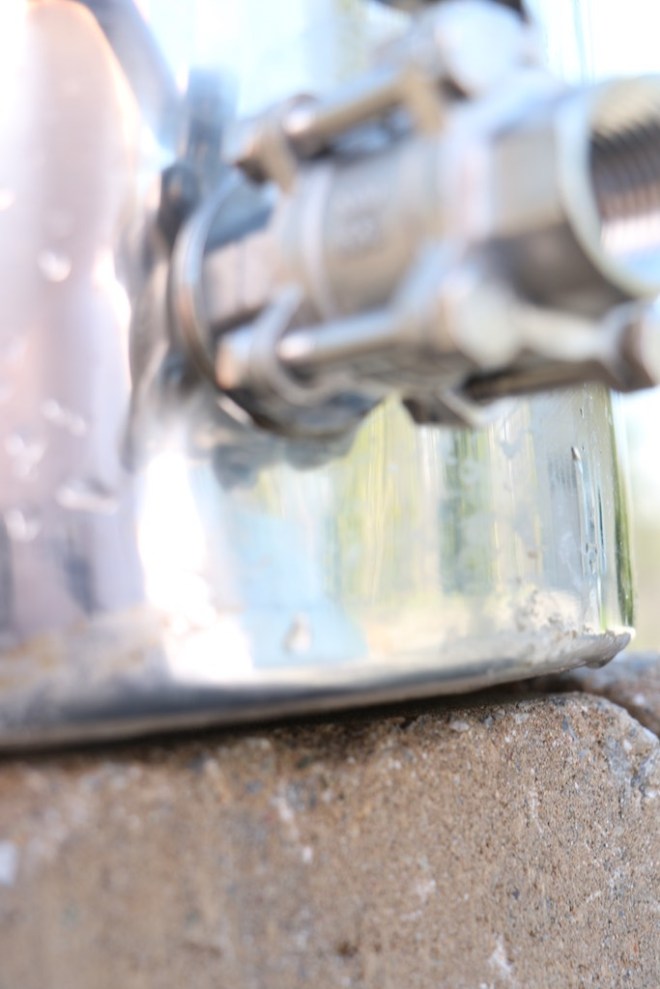
Sorry for the terrible photo quality here. I’m pretty sure the brain inside of my Canon lost its mind trying to figure out what I was photographing. The point is that the leak occurred not between the washer and the tank (sealed with a rubber washer), but between the washer and the valve (sealed only with teflon tape). I’m going to solve this problem and I’ll tell you what works. I will also provide some less terrible photos of the fix.

I’m getting ahead of myself. At this time yesterday, I didn’t know that the leak was persistent (after I tightened the fittings). I thought that I might have solved my issue, but I wasn’t convinced. What did I do…I trashed it. Classy, right?

IMG_1757

Unfortunately, it was not to be. The leak persisted and it needed to be moved once more to it’s final resting place (pre-still).

IMG_1767

Now all that’s left to do is wait and hope that my anal retentive sterilization was sufficient. The countdown ticks on. Hopefully the wash won’t mold.

Looking for a good read?

Just wanted to drop a quick note to let you all know that there’s a new book from King’s County Distillery – Dead Distillers: A History of the Upstarts and Outlaws Who Made American Spirits. I’m sure you all know of my affinity for their work. I have yet to actually drink their bourbon, but they built the recipe that I used. They also provided the distillation graph below, and drafted the bourbon family tree that I love so much.

I’ll admit to being enough of a nerd that I preordered the book. I received word from Amazon today that it’s on its way, and I’m excited to dive in. Their work is always a delight to read and chock full of information. Who knows, maybe my great grandfather will make an appearance somewhere in those pages.

Grab a bourbon and dive in!

So, you bake a lot?

Yep, that’s the question that I was asked when the young cashier at Bulk Barn rang up my jug o’ molasses and small mountain of brown sugar. I shrugged nonchalantly and said that these ingredients were the only way I know to make rum. He looked at me like I had gone mental and we parted ways.

You can take that introduction to mean that yes, the rum cookoff is officially complete. I modified the recipe to park the OG at 1.07 (17 brix). The conversion claims that it might spit out about 9.5 percent alcohol. We’ll see where it lands. The wash in the fermenter is high between 12 and 13 gallons. If we do, in fact, get 9.5% yield, we’ll have about a gallon of booze to play with. Sounds exciting, right?

A couple of other quick notes about this run:

  • I never brought the wash to boil. I figured hey, why invest the time in watching it cool. All I needed to do was dissolve sugar and molasses into it. It peaked at about 140 Fahrenheit. We worked to cool it quickly by tossing in ziplocs full of ice.
  • The new equipment (thus far) has performed admirably. I will be doing a more thorough review coming up. I even took pictures, I know…you’re shocked
  • I had to mix yeast since I didn’t have sufficient quantity of any one kind. I used high spirits 48 turbo (6.6 gallons) and high spirits whiskey yeast. We’ll see how it goes.

So now we wait, watch and ferment. The distillation will be a lot of fun this time both because there should be SO MUCH of it, and because I’ve got additional help thanks to family and the Man of Steele.


Rum for everyone.

I know, I know. This is how I’ll break your heart. The rye recipe is going to wait, and my upcoming batch will be, you guessed it, more rum.

Why?

How could I do this to you?

I understand that you’re all probably pretty tired of hearing about rum. I made rum last time, and, while it was very successful, it wasn’t particularly exciting. Making a sugar and molasses wash isn’t nearly as involved or as fun to read or write about as mashing rye and malt into an authentic Canadian whiskey. I’m doing the rum for a few reasons.

First, it’s a free time thing. Those meddlesome millennials (I may or may not be one) like to talk about work life balance. It’s a concept that other generations find somewhat laughable, but the long and short of it is that building the recipe and researching the technique takes time that hasn’t been readily available. I don’t want to provide the same old story – I mash some grains, I make some booze, we all go home happy. I want to be able to provide you all with solid information so that you can improve (or start making) your own. That requires good info and good info requires time. There, millennial tirade over.

Second, rum is pretty cheap and easy to make. I have a significant amount of new equipment and I don’t want it’s maiden voyage to be overly technical. The new burner for example will output significantly more heat than the old one. The new kettle is about 3 times the volume of the old one, and the fermenter is a little over twice as large. I want a simple run to test the scalability of my processes and to make sure that the new equipment is up to snuff. What if, for example, my brew kettle has leaky nipples. Yeah, I said it. Good luck getting that image out of your head. If I lose sugar and molasses I’ll be bummed, but not heartbroken.

Third, I’m going to (finally) put together the carbon filter, and the man of steele has graciously offered to let me use his home wine making plate filter to clarify the product. Again, I would prefer to take a run at the new processes with a batch I’m not particularly in love with.

So, what’s the game plan

Step 1 – Fermentation. I’m going to get the wash going in about 2 weeks. I’m going to let it ferment for another 1-2 weeks. I’ll probably let it go for 2.

Step 2 – Distillation. I now have a 14 gallon fermenter, and an 8 gallon still. Doesn’t make a lot of sense, right? Wrong. Remember when we talked about stripping runs and spirit runs and then making your cuts? The plan for distillation is to split the batch into 2 stripping runs and then double the quantity going into the spirit run and eventually into the cutting process. I should be able to double my output without doubling the labor associated with it.

Step 3 – Make the cuts. I’ll have twice the product which means I can probably be more selective in how I make decisions. I won’t be staring at a half empty jar and contemplating how I spend my time.

Step 4 – Filtering. Very exciting. I’ll keep you in the loop.

Step 5 – Splitting the batch. I’ll age some, liquer some, and, well…yes, probably drink some too.

The long and short of it is that despite the fact that rum isn’t the most interesting thing to make, and it’s not my favorite thing to drink, it’s simple and cheap to make and the yield is high enough that the margin of error will be comfortable with the new equipment.

More to come…


Things that are badass for 500 please, Alex.

For those of you wondering how I’m spending my time these days, I’m spending my time researching. I want 2016 to be a legendary watershed sort of year for my distilling. Unfortunately, that takes a lot of reading and math. Yep, math. I know, I know…I’m not great with it either. Now that I’m well into my thirties I can honestly say that if my high school teacher had only told me that I could use my powers to make booze if I studied harder I probably would have. Anyway, let’s let bygones be bygones. I graduated ignorant and am playing catch up. Woe is me.

There has been a little ray of sunshine in all of this studying. For those of you keeping track, I have some pretty lofty goals this year. I want to fine tune the flavor of my liquor, and that means an upgrade to some equipment. Let’s not get crazy and think that it’s time to grab a new copper still. I believe wholeheartedly in my tried and true Brewhaus. The rest of my equipment, however, left much to be desired. So, let’s take a look at what I got.

For those of you who live in Canada and are interested, all of this equipment came from beergrains.com. I’m still a big fan of that site and they’ve never once let me down. In the interest of full disclosure, there was an issue with my order. However, they shipped me too much not too little. They’re straight up awesome to work with and I still recommend them. So, what did I get? I got 3 things:

  1. A sweet new brew kettle to mash the grains.
  2. An amazing stainless steel fermenter
  3. The Godzilla of all propane burners

Here’s some info on the new equipment:

Let’s start with the brew kettle.

A good sized pot is important for any distiller. As you know, I’ve been using a Turkey frier pot for the last 2 years. It was a good run, but it wasn’t sufficient to meet my long term needs. It fell short when it came to volume, and also when it came to flexibility. Let’s start by looking at the new kettle.

IMG_1627

See that? It looks like it’s just as happy to see you as you are to see it. Rawr.

I jest at the large screen attachment, but in all seriousness you can see that the volume of the pot is substantially larger. In addition, it has welds that facilitate a valve for training and an angled thermometer that will help me control the mashing process. The screen attachment will be invaluable when it comes to sparging (which is something we’ll discuss soon).

IMG_1628

I may need to rotate the face of the thermometer, but you can’t get better than that when it comes to visibility. The second (top) weld puts the probe straight into the middle of the mash. You may also note the valve below the thermometer. The quality there seems fantastic. It has a ball valve and a lock so that you can’t flip it on accident. Here’s a shot of the valve.

IMG_1629

This pot, coupled with the new burner, should really let me control the mashing process. Exciting times.

With that introduction, let’s look at the new burner. It’s a popular model with the homebrew crowd. Behold the majesty of the Bayou Classic Banjo burner.

IMG_1635

Yep, it’s huge. What do I like about it? In a word, surface area. But wait, that’s two words. I DO WHAT I WANT.

Anyhow, I love the fact that I can kick this puppy on low and get a nice simmer going on both the kettle and the still. For those of you who have recently checked out the pictures of my old rig, you’ll see the turkey frier setup had a few issues.

  1. It had a damnable 10 minute shutoff. The shutoff was more of an inconvenience than an issue in mashing. It was a HUGE issue in distilling.
  2. It was built to hold a turkey frier pot. That means that it had these weird little prong things that I had to rest the still on. I like the low profile (read: center of gravity) here. I also like the large and presumably stable bracket.

The size of the burner should give me incredible temperature control through the mashing and distillation processes.

look at the size and quality of the hardware. I love the guard.

IMG_1637

It has a nice, big gas intake. It also has a really nice adjustable air regulator.

IMG_1638

See those 2 little holes in the stainless steel plate (where the hose connects)? You can adjust that to adjust the amount of fresh air that’s mixed with the LP to power the burner. Cool, right? Also…NO DAMNABLE TIMER. That’s right. It’ll stay right where I put it. This is perhaps a good time to remind you all not to leave your stills unattended. Stable heat is important. Constant supervision and attention is more important.

Well, now that we’ve gone through those 2 things, let’s talk about the last one. The stainless steel fermenter. I’ll be honest and say that I’m an idiot and didn’t take good pictures of it. You can see it for yourself on the beergrains.com website.

IMG_1631

IMG_1632

In my defense, I told you that the pictures were bad. Despite the bad pictures, I’m excited about this gem. I’m excited because:

  1. Stainless steel means that I can use steam rather than chemicals (if I so choose) to sanitize. I’m trying to improve my flavor. I’m not saying the chemicals are a contributing factor, but i’m interested. I’ll also be honest and say that I picked up a new liquid sanitizer. I’ll let you all know how that goes.
  2. It has a fricking valve so I can easily move the fermented product into the still. How cool is that?
  3. The weight, strength and overall construction indicates that the quality is fantastic. I’m very impressed with how this thing is put together.
  4. It’s all inclusive. I know that might sound silly, but this thing came with the teflon tape required to seal it. It actually came with enough for me to seal the brew kettle as well. That’s awesome. It was a complete solution for me.

I guess that the summary here is that I’m really excited about all of this equipment. I had done a fair bit of research leading up to it and I think I’ll be very pleased with it.

The next batch is coming soon. I’ll let you all know the new equipment performs.

Rye of the tiger.

Ladies and Gentlemen, the winner for the spring run is, you guessed it, rye whiskey. It’ll be my first attempt at a Canadian classic, and I’m pretty excited about it. I’m still looking to do something with seasonal fruit this year, but let’s face it – there isn’t exactly a whole lot growing out there. Besides, starting off with a whiskey that needs to age should prove a good decision. I still have a whole lot of bourbon, rum and limoncello to go through.

So, what’s the plan? I’ve started doing some preliminary research on the distillation of rye and it seems relatively straight forward. For those of you interested in my source material, I’m pretty pleased with this link. It brings up some interesting points on rye, like the fact that rye contains the alpha-amylase enzyme that we discussed earlier (on the topic of high adjunct mashes). The fact that the grain will contain the enzyme required to convert starches to fermentable sugar  is a big plus in my book. It also appears that malted rye contains a delightfully high diastatic enzyme count. It’s not surprising given that the base grain contains amylase, but it’s still nice to hear.

If there’s one thing I’ve learned from the 2016 presidential campaign, it’s that I need to do some fact checking. I’ll do some more poking around to work towards a recipe. While I do enjoy a high rye count (like Ryemageddon from Corsair Distillery), I don’t think I will go strictly rye. I don’t think that I’ll go corn either, though I may add some corn. I want to stick with grains – Rye, barley and maybe a bit of wheat. I will certainly keep proportions in mind (stick with at least 3 parts rye to 2 parts (x)). I will also take a long look at yeast options for this run.

More than anything else, I really just need the weather to cooperate. I’d really like to mash above freezing. Whimsical Canada…

A special thanks to my mashin’ muse John (the Man of Steel). Without him, I’d probably still be wondering what to whip out for the spring. Good call buddy.


Bootleg liquor, bootleg filters.

The problem’s simple. You spend the time to source the ingredients, mash the grain (or boil the wash), ferment and ferment some more, and finally distill, then again and (if you’re feelin’ crazy) yet a third time. Maybe once you’re done you run it through active carbon and maybe you don’t. You toss it in a jar with wood chips and any flavours you want and you wait. Then, weeks or months later you go to claim you prize. Unfortunately, it looks a little something like this:

IMG_1566

Mmmmmmm. That is some delicious high test swamp water. I know, it looks appetizing. This picture, in case you can’t quite make out the label, is the rum that I put together as my final 2015 run (which was actually in ’16…don’t judge me). To really illustrate the point, before I added the wood and the wash (to give it a little sweetness, color and molasses complexity) it looked like this:

IMG_1547

Yep, we went from crystal clear to bog water in about 2.5 months. It looks nasty and it’s certainly nothing that you’re likely to share with your friends. “Hey guys, check this out. No, no, it’s not from the gutter – just take a sip, you’ll love it.”

Anyway, I’ve been trying to solve this problem in a cost effective manner. The process is still in development, but here’s what we’ve come up with so far.

Step 1. – the cheesecloth funnel.

IMG_1567

Yep, that’s high tech. you make a plug out of cheesecloth and stuff it in a large funnel. You want the cheesecloth to be tight. Fluid needs to pass through it, but you don’t want it to be free flowing, right? remember that the point is to take out as many particulates as you can at this step.

IMG_1568

Then you filter it right into a large measuring cup (or another jar…which is my preference). You can see that the fluid is trickling out of the funnel. It doesn’t have the capability of forming any sort of proper stream if you’ve packed the cheesecloth right.

When you’re done with one pass, it’ll look something like this:

IMG_1569

I usually pull the plug at this point. Then I toss the chips and rinse the funnel. I make a new plug and then strain my old plug into the new one. I mean, come on…it’s product, right? Then I’ll do the same thing again.

Once you’ve done this 2-3 times, you should see a pretty marked improvement in the clarity. From here you have a few options. Unfortunately, I lacked the foresight to take pictures of this process from start to finish. In the interest of full disclosure, the following pictures are the bourbon from May 15, not the rum from Jan 16.

Option 1 is a Brita. I’ll be honest and say that this process worked pretty well for the whiskey and the dark rum (pictured above). The white rum that was aged with lemon peel for limoncello did not do as well. We’ll cover that in a later post. I just toss that out there so that you know to start slow with the Don’t commit all the product until you are sure you want to.

Here’s my trusty brita working on that whiskey:IMG_1534

You will note the sediment buildup in the bottom. It’s finer than the cheesecloth (thank you capt/ obvious). you should see even clearer whiskey coming out of the brita. I usually do this at least twice. I run distilled water through in between.

The clarity (with all but the limoncell0) was vastly improved both times:

IMG_1555

Here it is in its final form, proof tested at about 85-90 proof (along side Alex Kieth’s pride of Nova Scotia).

If I hadn’t had the recent issues with the brita leaving my limoncello cloudy, I would have left this at my recommendation. The old cheesecloth to brita was successful for multiple runs. Now, maybe it’s my fault and I should have replaced the brita filter (which is also active carbon in case you were wondering)…but I don’t know. There’s no benchmark to test it with moonshine (at least none that I’m aware of). For all I know, it may have been something to do with the lemon oil that was so prevalent in the mix. Who knows. I think that, given my recent experience, I will try with a paper coffee filter to see what that does to clarity. I’m sure that I’ll let you know how it all turns out. After all, the spring run is in the planning phase now. We need to crawl back up above freezing again and we’ll be ready to rock and roll.

If anyone has any recommendations for an improved “bootleg filtration” process, I’m all ears.

A short discussion on yeast.

We haven’t talked a whole lot about yeast in the past, and, since we’ve resolved to take the training wheels off a bit this year, now seems like a good time to dive in. Just about any home brewer will tell you that yeast is one of, if not THE, most crucial ingredients in his or her batch. Distillers seem rather quieter on the matter, but that could be for a variety of reasons…not the least of which is that distillers seem to be quieter regarding their batches in general. Most of the reading that I’ve done on the subject really focuses on making the cuts and monitoring temperature. I understand why. Monitoring the temperature is the best way to both maximize yield and ensure that you’re not boiling up a big ‘ol jar of poison. However, there seems to be little material regarding ways to improve the taste of the shine. My theory is that this is where yeast can play a pivotal role.

As previously discussed, yeast nutrient has some pretty nasty stuff in it. I understand that the yeast needs it to thrive in a high alcohol environment (most turbo yeasts will push up to 17%). However, there’s nothing to what impact those chemicals do or do not have on the overall flavor. So, let’s talk a little bit about White Labs and what I hope they can do for me.

White Labs is a company that does a lot, and I mean a lot with yeast. It’s safe to say they’re obsessed. If you haven’t had the opportunity you should certainly check out their page: http://www.whitelabs.com/. In addition to stocking brewer’s yeasts they do have a few strains for distillers that should provide both the strong attenuation and high survivability that distillers need. Now, I say “should” because I have not yet tried out their products. You can expect a report once I have.

The good folks at white labs were kind enough to provide the consumer with data regarding attenuation, flocculation, temperature ranges and (you guessed it) alcohol tolerance.  Their distiller’s yeast bank in particular has the high tolerance that we’re looking for. Now, I doubt that the high tolerance is 17% like the turbo yeast, but it, allegedly, is good to go until 10-15%.

If you’re unfamiliar with attenuation and flocculation, here’s a brief description.

Attenuation – has to do with how productive the yeast is. It’s calculated throughout the period of fermentation by tracking specific gravity. As the yeast devours the sugar the density of the mash/wash decreases. Tracking the density and running the numbers will let you know how much sugar has been consumed and, therefore, how much booze you have.

[(OG-FG)/(OG-1)] x 100 = attenuation percentage. (yes, I stole that formula from white labs…don’t judge me).

The reason I appreciate White Labs publishing the data is that the home distiller now has a target in mind. We can say BAM the yeast is done. It’s done all it can do according to the manufacturer and we can move ahead to distillation without worrying whether or not the yield will be as high as possible.

Flocculation  – It’s a thoroughly disagreeable word. I don’t like the way that it sounds, but that’s not really relevant. Flocculation is all about how successful the yeast is at sinking to the bottom (and out of the way) once the sugar – alcohol conversion is complete. Wild yeasts and many of the bread/brewer’s yeasts don’t really flocculate that well. Since you really don’t want particulates (including flocculated yeast) in your still, knowing what to expect from a flocculation perspective is nice . There’s not (to my knowledge) a more advanced way of measuring flocculation than looking at it and saying, “yep, it’s flocculated”. If I learn otherwise I’ll certainly post something.

The other 2 data points (temp and tolerance) are just nice guidelines. In my opinion, it’s nice to know how warm the mash/wash needs to be kept during fermentation. Understanding tolerance is also great since, well, if we’re talking about a 6 gallon fermenter, 10% is only .6 gallons. It’s a potent .6, but by the time you do your stripping run and cut using the method discussed earlier, you’re left with a pretty sad, lonely little jar. Needless to say, higher tolerance is better. We’ll see what impact the strain has on the taste of the final product.


Winter is…over?

It was a balmy 8 degrees (C) up here in Ottawa today, and it got me thinking about a few things. First, it got me thinking about how long it’s been since I’ve enjoyed a good cigar. For a variety of reasons I don’t smoke in my home. Ottawa isn’t a tobacco friendly kind of town…mostly because the government that makes the laws is the same government that oversees the healthcare system. I don’t suppose it would make a whole lot of sense to be pro-tobacco if you knew that you’d end up paying for it in the long run.

So there. I want a cigar, but I digress. It’s time to start preparing for the spring batch. I’m hoping for a fun and more active season than 2015. Don’t get me wrong, 2015 was a pretty great year for the overall quality of the product. Working on better temperature management, understanding adjuncts and making appropriate cuts did amazing things, but I want to get better.

With that in mind, I thought perhaps it’d be nice to set a few new year’s resolutions for my favorite dubiously legal pastime. So, here they are:

  1. It’s time to break up with prepackaged yeast. Don’t get me wrong, I think that turbo yeast and the whiskey yeast that I’ve relied upon to date did a great job. The yield, especially the yield of the last rum run was really great. However, the stuff has an odd scent that I just can’t shake. Since I’m not really sure what chemicals are put in the turbo yeast (that proudly proclaims: “no urea”), I want to try to break away a bit. That means there will be some reading and probably some information coming down about how to provide yeast with the nutrients it needs to keep the little fellas producing for 2 weeks.
  2. I want to do a fruit run. I wanted to do it last year, and it never happened. I’ve washed with sugar and molasses. I’ve mashed with corn and barley. Now, it’s time to try something fruity. I’m not sure what just yet. I think I’ll try for a summer fruit run. Peaches, Nectarines or something like that.
  3. Time to check on consistency. I have not run the same product twice at this time. I kind of want to. I’m thinking of doing 2 consecutive weekends. I dare say, a Shine-a-thon. The same ingredients, the same cuts. How consistent can I get the taste of the product. What can I learn from such an amazing experience.
  4. Find some other shiners. No, not shriners…though, I’m sure that’d be fun too in a helping kids and riding motorcycles kind of way. Surely someone else in this town has some experience. There’s a small distillery in Ottawa (North of 7). I don’t know much about it, but perhaps they could get me a bit more plugged in to the community…if such a thing exists.

There are, of course, extras that I’m interested in. How does the water impact a the product. Afterall, everyone in KY proudly proclaims the limestone in the water gives their bourbon the subtle flavor that can’t be matched out of region. I’d like to try a copper still and a traditional condenser. I’d like to experiment with more ethanol recipes (though the limoncello is getting better and better).

Anyway, that’s all for now. I’m sure there will be more to come soon.


Winter is coming.

One last post for the day to let everyone know that I’m officially on winter recess. Last year I learned that I lack the fortitude to stand out in the cold and run a still for hours on end. I’m not even going to attempt a new batch until at least mid March (weather dependant). I will be posting a few things in the meantime mostly technique tips, discussions on reflux stills with copper mesh vs. ceramic beads, etc. I will, of course, also be planning my spring run.

Thanks to all of you for reading. WordPress informs me that we’re getting more hits than ever. I will keep content coming in the next few weeks.